In this post I solve an older Linux assignment from the course I’m attending. This acts as a kind of a summary of the things I’ve learned during the course. I’m using my HP EliteBook 2570p laptop and a Linux live USB stick with Xubuntu 16.04.3.
Here’s the assignment in Finnish:
Haluamme tehdä PHP-kotisivuja etäältä.
Työntekijöitämme ovat Jorma Mähkylä, Pekka Hurme, Ronaldo Smith, Håkan Petersson, Einari Mikkonen, Einari Vähäkäähkä, Eija Vähäkäähkä. Tee heille HTML5-esimerkkikotisivut siten, että kunkin testisivun otsikossa lukee omistajan käyttäjätunnus.
Maija Virtanen jatkaa ylläpitoa, tee hänelle sudo-tunnus. Maija haluaa käyttäjätunnuksen “maija”.
Pekka Hurme aloittaa LAMPin opiskelun. Tee Pekalle oma tietokanta, ja muuta hänen PHP-esimerkkisivunsa näyttämään tietueita tietokannasta (eli tietokantojen “hei maailma”).
Jorma aikoo kehittää uuden sivun sleep.example.com. Laita Jorman kotisvu näkymään myös tästä osoitteesta. Voit simuloida nimipalvelun toimintaa hosts-tiedoston avulla.
Suojaa kone tulimuurilla.
Tee uusi komento ‘wowstats’, joka näyttää tietoja koneen tilasta. Sen tulee toimia jokaisella käyttäjällä työhakemistosta riippumatta.
So, in short, I need to create new users for all the workers, add the feature to connect remotely and write HTML5 sites, install LAMP and a simple database, connect a local site to a domain, enable a firewall and finally write a script that displays system statistics for anyone. Should be manageable!
Installing all needed programs and using PHP
I started by installing all the programs I knew I would need. I performed a quick package list update with “sudo apt-get update” prior to installing the programs:

I knew that I’d need to use PHP and give Apache access to user folders so I granted the access with “sudo a2enmod userdir” and I used “sudoedit /etc/apache2/mods-available/php7.0.conf” to comment the PHP restrictions that were set on default. After all Apache configurations I restarted it with “sudo systemctl restart apache2.service“.
All users needed a folder called “public_html” in their home folders and a php.index file. I found out about the “skel” folder in “/etc” that holds files and folders that get automatically copied over to a new user’s home folder. Since this was the obvious route to take, I just created the public_html folder into skel and added a short index.php file that the users could easily edit:
<!doctype HTML>
<html>
<head>
<title>Nimi</title>
<body>
<h1>Nimi</h1>
<?php
echo 6*6
?>
</body>
</html>
Adding users
I started by creating new users for all the workers with the command “sudo adduser username“. I also created the user “maija” and added her to the “sudo” group with the command “sudo adduser maija sudo“. Remember, always use STRONG passwords when creating new users.
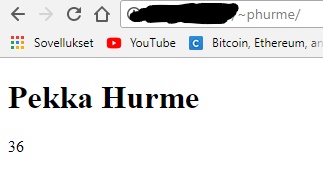
I tested out all the users and edited the index.php files so that they included their names. Everything worked well:
Creating a MySQL database and connecting it to a PHP site
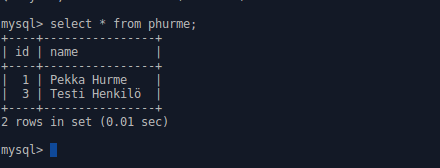
Here I needed to create a simple database with MySQL so that the user “phurme” could modify it and use it on his PHP site. I started by logging onto my MySQL server with “mysql -u root -p“. I created a database for phurme with “CREATE DATABASE phurme CHARACTER SET utf8;” and gave the rights (and defined the password) with “GRANT ALL ON phurme.* TO phurme@localhost IDENTIFIED BY ‘phurmepassword’;“. I exited and logged in with phurme to create a table to the database. With “CREATE TABLE phurme(id INT AUTO_INCREMENT PRIMARY KEY, name VARCHAR(1024));” I created a table and added a value with “INSERT INTO phurme(name) VALUES (‘Pekka Hurme’);“. I tested it out with “SELECT * FROM phurme;“:
After the database was set I needed to connect it to the index.php file that phurme already had in his public_html folder. I used SSH to login with phurme and used the following code to connect the database. This was taken from a guide created by Tero Karvinen, all credit goes to him:
<?php
$user=’phurme’;
$password=’phurmepassword’;
$database=$user;
$dsn=”mysql:host=localhost;charset=utf8;dbname=$database”;
$pdo=new PDO($dsn, $user, $password);
$pdoStatement=$pdo->prepare(‘SELECT * FROM phurme;’);
$pdoStatement->execute();
$hits=$pdoStatement->fetchAll();
foreach($hits as $row) {
echo “<p>”.$row[‘id’].” “.$row[‘name’].”</p>\n”;
}
?>
This worked well:
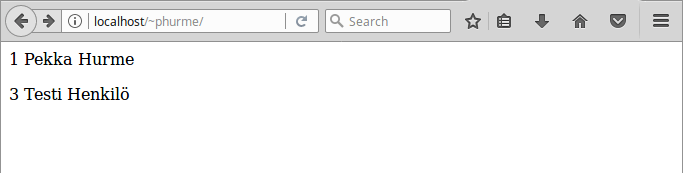
The user phurme can now use and edit the index.php file and his own database with MySQL.
Using a virtual host and the hosts file
The next step was to make the user jmahky a new site folder and to move the index.php file there. I used mkdir and mv to create the folder and move the index.php file inside. Next, I added a new .conf file into /etc/apache2/sites-available called example.conf since the site folder I created was called example.com. The configuration file included the following:
<VirtualHost *:80>
ServerName http://www.sleep.example.com
ServerAlias sleep.example.com
DocumentRoot /home/jmahky/public_html/sleep.com
<Directory /home/jmahky/public_html/sleep.com>
Require all granted
</Directory>
</VirtualHost>
Additionally I edited the hosts file in /etc to include the following:
127.0.1.1 http://www.sleep.example.com
127.0.1.1 sleep.example.com
Now the site came up with the correct addresses:

Enabling the firewall
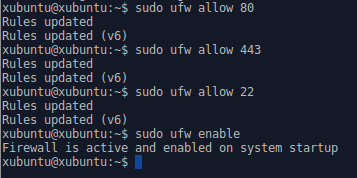
I decided to use UFW since it’s easy to use, handles the job and comes pre-installed. Before enabling it I added some exceptions to a couple of ports I believed to be necessary (22, 80 and 443) with “sudo ufw allow portnumber“. After this I enabled UFW with “sudo ufw enable“.
Scripting WOWSTATS
Finally, my goal was to create a script called WOWSTATS that would showcase system statistics to ANY user that executed it. This wasn’t my strong suite so I decided to refer to the blog of Ilkka Katajamäki. Here I saw Ilkka had used nano to write a script with the following commands:
#!/bin/bash
date
ls
pwd
iostat -h
I did the same but installed sysstat before since iostat is part of it and I was running Xubuntu on a live stick that didn’t include it. After writing the script I ran it with bash and it worked great:
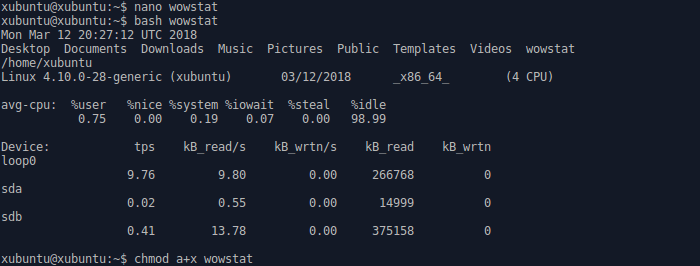
Since the script worked fine, I used the command “chmod a+x wowstat” to grant the needed permissions. I also moved the file to /usr/bin where all users could use it. I tried it with a couple of different users and it worked great.
This concludes the assignment.
Sources:
http://terokarvinen.com/2017/aikataulu-%E2%80%93-linux-palvelimet-ict4tn021-7-ti-ja-6-to-alkukevat-2018-5-op – The course I’m attending, taught by Tero Karvinen
http://terokarvinen.com/2017/arvioitava-laboratorioharjoitus-%E2%80%93-linux-palvelimet-ict4tn021-2-uusi-ops-alkukevaalla-2017-p1 – The assignment
http://terokarvinen.com/2016/read-mysql-database-with-php-php-pdo – Tero’s PHP instructions which helped greatly
https://ilkkakatajamaki.wordpress.com/2018/03/11/linux-palvelimet-osa-7-kertaus/ – Ilkka Katajamäki’s blog, reference for bash
https://www.w3schools.com/php/default.asp – PHP refresher
http://www.linfo.org/etc_skel.html – Info on the “skel” folder
