This is a more linear post where I explain how to use the terminal emulator on Xubuntu and a bit about SSH. I’m attending a course taught by Tero Karvinen and these actions are part of an assignment. The computer I’m using is an HP EliteBook 2570p and the OS version is Xubuntu 16.04.3.
Logging actions and monitoring
My first task was to create two entries to the system authentication log. In order to get access to the log, you first need navigate to the “root” folder. Root is, as the name implies, the first folder in which every other folder is included in. From the root folder, you can navigate to any other folder. Start by opening up the terminal with “Windows” + “t“.

The first thing we need to is to find out where we are. To do this, you can type in “pwd” (print working directory), and the terminal will tell you your directory location. By default, you should be in your users home folder.

Now that we are aware of our surroundings, it’s time to navigate to the root folder. Navigation in the terminal happens by typing in the command “cd” (change directory). For instance, if you wanted to access a subfolder, you could type “cd foldername/”. If you want to access an upper folder, you can type “cd ..“, which will take you to the upper folder from your current one. Because we know that the root folder is the highest folder in the tree, we could just type “cd ..” in multiple times. Here I chose to use the command “cd /” which takes you to the root folder every time.
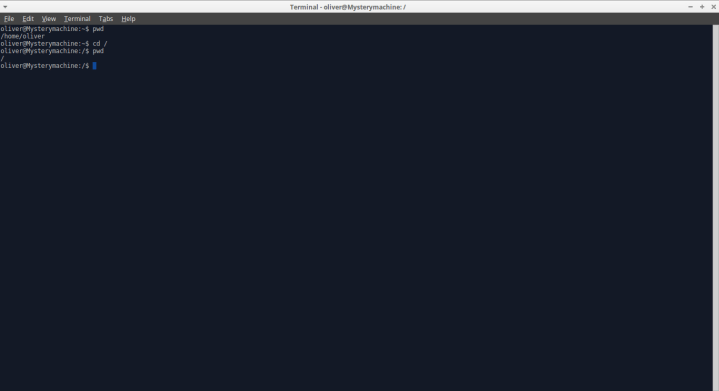
You can use pwd to make sure you’re in the root folder. If you see the “/” symbol, you’re in the correct one.
Now that we are in the highest folder, the only way is down. To see what folders and files the root folder has, use the “ls” (list) command.

Here we can see the folders included in root. I already know that the log file I need is in the directory var/log, so I need to navigate there. Here I can use the command “cd /var/log” to gain access. To see that the correct file is there, I’ll use ls to see the files in the folder.
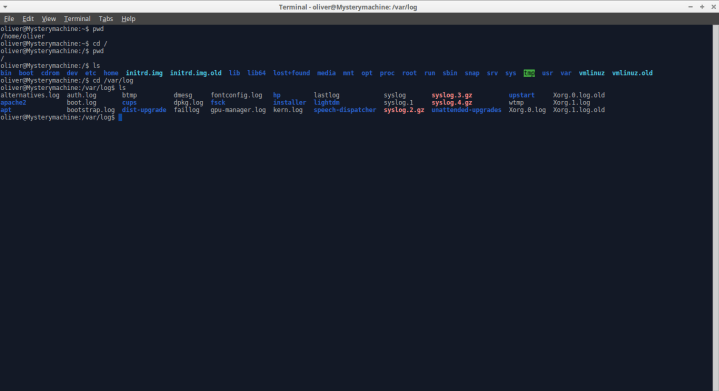
Auth.log is there so now I only need to open it. I want to monitor the log file in real-time, so I’ll use the “tail -f auth.log” command to open it. This way I can see the changes happening to the log as I post commands to the terminal.

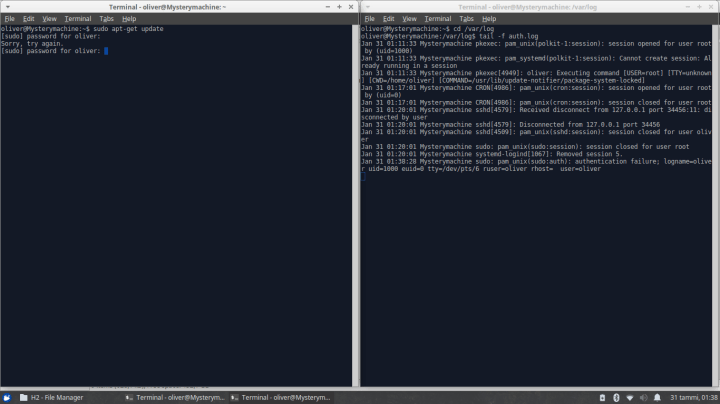
Here we can see that the auth.log is open. Now we can test if we can see the changes happening to it in real-time.
To test this out, I opened up another terminal window and typed “sudo apt-get update“. When the terminal asked for my password I deliberately gave it a false one. Here you can see how the log file reacted:
Jan 31 01:38:28 Mysterymachine sudo: pam_unix(sudo:auth): authentication failure; logname=oliver uid=1000 euid=0 tty=/dev/pts/6 ruser=oliver rhost= user=oliver
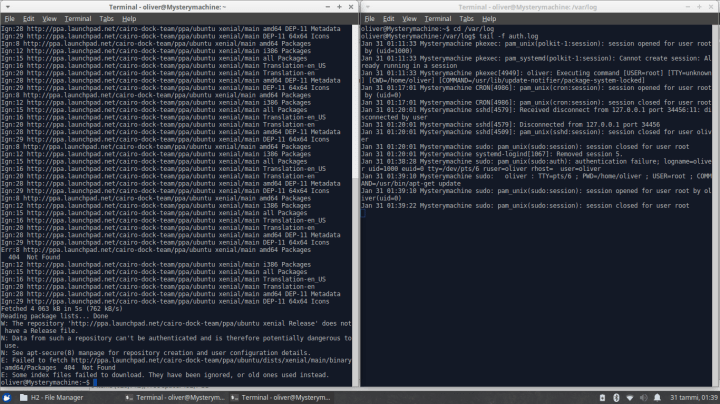
After I gave the terminal the correct password, the entry to the log was different:
Jan 31 01:39:10 Mysterymachine sudo: oliver : TTY=pts/6 ; PWD=/home/oliver ; USER=root ; COMMAND=/usr/bin/apt-get update
Jan 31 01:39:10 Mysterymachine sudo: pam_unix(sudo:session): session opened for user root by oliver(uid=0)
Jan 31 01:39:22 Mysterymachine sudo: pam_unix(sudo:session): session closed for user root
Let’s analyze these lines.
Wrong password:
Jan 31 01:38:28 – a timestamp declaring the logging time.
Mysterymachine – PC name.
sudo: pam_unix(sudo:auth): authentication failure – pam is a password authentication module. Here we can see that the user has tried to gain sudo access and that the password has been declined resulting in an authentication failure.
logname=oliver – States the active username.
uid=1000 euid=0 – user id and effective user id. Not sure about their difference
tty=/dev/pts/6 – States the terminal in use.
ruser=oliver rhost= user=oliver – State the user, not sure about the difference.
Correct password:
Mysterymachine sudo: oliver – States which user gets sudo access.
PWD=/home/oliver – Shows the folder in which the command is executed.
COMMAND=/usr/bin/apt-get update – States the executed command.
SSH server installation and testing
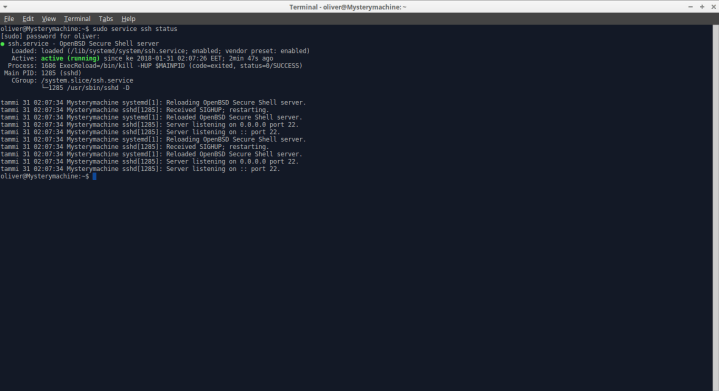
We installed an SSH server in class with the command “sudo apt-get openssh-server” and I wanted to try it out a bit. If you want to install the server also, use the command above. After installation you can connect to it by typing “ssh username@localhost“. With the command “passwd” you can set a password, be sure to do so. You can always check the status of your SSH server by typing “sudo service ssh status“.
Now that I have my SSH server up and running, it’s time to try a command. I decided to use “scp” (stands for secure copy). Basically, scp copies files over a secure, encrypted network connection. I wanted to transfer a PNG file named “gimp” I had in my home folder to my desktop. To do this, I typed in “scp gimp.png oliver@localhost:~/Desktop” and the file was successfully transferred to my desktop. As you can see, scp is quite simple to use!

The perfect apt-get command
Here I needed to define the “apt-get command of my dreams”. Essentially I needed to name my favorite programs that I couldn’t live without. So here are the pieces of software I’d always prefer to install:
VLC – A flexible video player
HTOP – A graphical resource monitor
Chromium – A web browser similar to Google’s Chrome
GIMP – A free and comprehensive graphics editor
Thunderbird – Mozilla’s open-source email client
Start with “sudo apt-get update” to update your package lists. Remember that you can string these programs together and install them all in one command:
sudo apt-get install vlc htop chromium-browser gimp thunderbird
Terminal programs
Lastly I needed to install three programs that can be run on the terminal emulator. I chose the following:
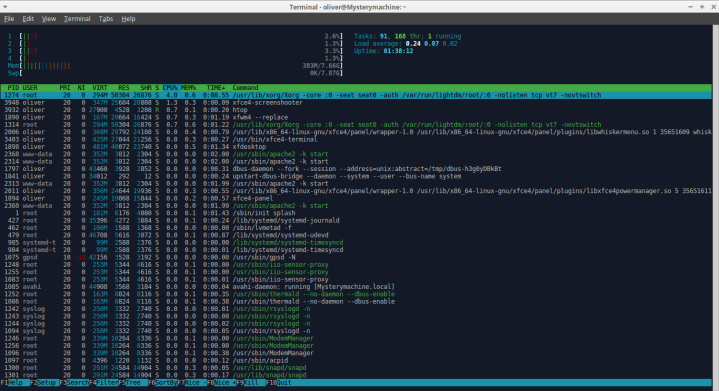
hTop – for resource monitoring
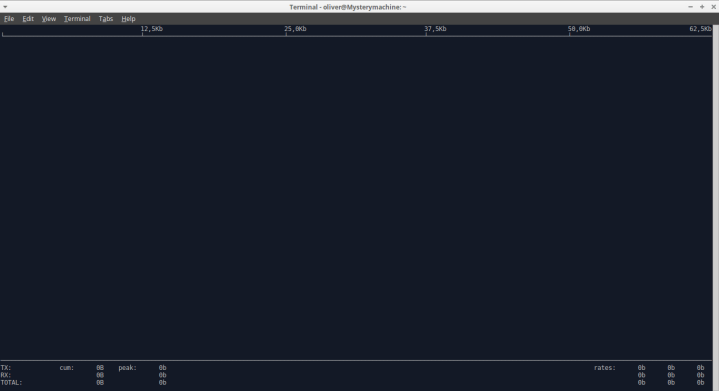
ifTop – for network speed monitoring
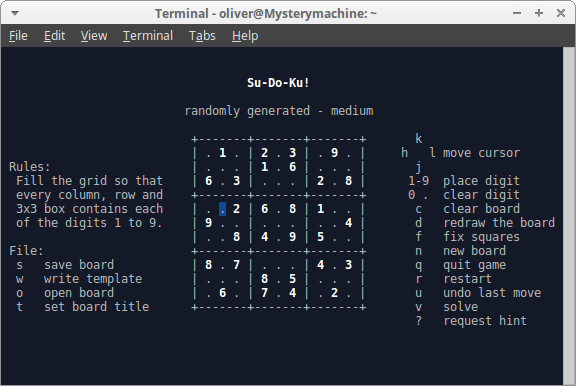
sudoku – for fun!
I installed all of these in one command “sudo apt-get htop iftop sudoku“.
hTop is a program for monitoring your hardware resources in real-time. It’s very convenient and easy to comprehend.
ifTop is for network speed monitoring. Because it needs special privileges you need to run it with sudo.
Sudoku is a fully functional game that runs in terminal emulator. Quick and easy to jump into!
Sources
http://terokarvinen.com/2017/aikataulu-%E2%80%93-linux-palvelimet-ict4tn021-7-ti-ja-6-to-alkukevat-2018-5-op Course site
http://terokarvinen.com/2009/command-line-basics-4 Basic Linux commands
http://terokarvinen.com/2008/commands-for-admin-4 Linux commands for admins
https://www.lifewire.com/what-is-a-root-folder-or-root-directory-2625989 Definition on root folder
http://ubuntuhandbook.org/index.php/2016/04/enable-ssh-ubuntu-16-04-lts/ Instructions for SSH installation
https://www.computerhope.com/unix/scp.htm Instructions on scp
https://linux.die.net/man/8/pam_unix Information about pam
https://unix.stackexchange.com/questions/191940/difference-between-owner-root-and-ruid-euid RUID and EUID difference

3 thoughts on “(Xubuntu) Using the terminal emulator”